Faut-il être très précis pour faire du Papercut ?
Oui ça aide, mais pas de panique : les modèles sont pensés pour les débutants. Plus vous prenez votre temps, meilleur sera le résultat.
Quel matériel faut-il pour commencer ?
Vous aurez besoin d’un modèle imprimé, d’un cutter de précision, d’un support de découpe (type tapis autocicatrisant) et de patience !
Est-ce que c’est compliqué si je ne suis pas manuel·le ?
Pas du tout ! Ce tuto est conçu pour les grands débutants. Il suffit de suivre les étapes tranquillement, sans se mettre la pression.
Et si je n’ai jamais utilisé de cutter ?
Aucun souci. Le tuto explique les bons gestes, et vous pouvez vous entraîner sur une chute de papier avant de commencer.
J’ai peur de tout rater si je coupe mal…
C’est normal ! Mais chaque erreur se rattrape ou s’intègre au rendu final. C’est l’ensemble qui compte, pas la perfection.
Combien de temps faut-il prévoir ?
Pour une première fois, comptez 30 à 45 minutes. C’est un moment de calme, presque méditatif — pas une course !
Découvrez le Papercut en vidéo
Sommaire : Explorez ce tuto Papercut
Introduction : Pourquoi essayer le papercut ?
Vous cherchez une activité manuelle apaisante et originale ? Le papercut, ou l'art du découpage papier, est un excellent moyen de s’initier à un nouveau loisir créatif. Avec peu de matériel et une grande liberté de création, il s’adresse à tous les niveaux.
Ce tuto est destiné à celles et ceux qui souhaitent se lancer dans la réalisation de leur tout premier papercut, avec des conseils pratiques et des astuces pour éviter les erreurs courantes.
Pour terminer cet article important, je souhaite qu'il puisse évoluer avec vos retours et commentaires. Dans ce sens, vous trouverez tout en bas un espace pour laisser un commentaire sur cet article. N'hésitez pas non plus à venir échanger dans la communauté Cardamine Papercut sur Instagram ou Facebook pour des conseils ou des avis !
1. Résumé en un coup d'œil
Le papercut, véritable activité de DIY, vous invite à créer des œuvres uniques avec du papier. Voici ce que vous allez découvrir :
Le matériel de base pour commencer.
Les étapes clés pour un papercut réussi.
Des conseils pour éviter les erreurs courantes.
Des idées et astuces pour aller plus loin dans cet univers créatif.

Un modèle de Papercut prêt à être découpé

Le même une fois terminé et monté
2. Les étapes pour créer son premier papercut
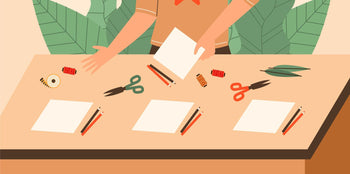
a) Le matériel nécessaire pour ce loisir créatif :
Pour bien débuter, vous aurez besoin de quelques outils simples :
- Outil de découpe de précision : un cutter de type scalpel est idéal.
-
Tapis de découpe : protégez votre surface de travail et facilitez la découpe. Choisissez un tapis adapté à la taille de vos modèles.
- Un Modèle de papercut : Choisissez un design simple pour débuter.
Démarrez le Papercut avec un kit d'outils comme celui-ci. Il inclus tous les outils nécessaires à la pratique du Papercut !
Choisissez ensuite un modèle pour débutant parmi tous ceux proposés sur la boutique :
💡 Astuce :
Je vous propose un kit de démarrage au format A4 si vous souhaitez ne pas vous tromper. Investissez dans des lames de rechange pour garder votre découpe nette et précise. Vous devrez en changer régulièrement, pensez à en avoir toujours d'avance pour ne pas être à cours au mauvais moment :)
b) Préparation du modèle
- Choisir un modèle dans la boutique ou imprimez vous même votre modèle : Choisissez un motif adapté aux débutants, avec des lignes simples et peu de détails fins.
- Fixez le papier : Utilisez un ruban adhésif repositionnable léger pour maintenir le modèle sur le papier épais.
- Planifiez vos découpes : Commencez par les zones intérieures avant de découper les bords. Prenez une pause et réfléchissez à ce que vous souhaitez faire ensuite.

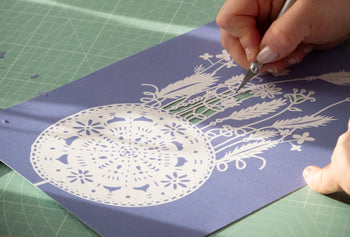
Voilà comment se présente le modèle Cardamine "Papillons"

Le modèle Phasia prêt à être découpé
c) La technique de découpe
Lorsque vous commencez à découper, il est important d’appuyer légèrement sur l’outil.
Plutôt que de forcer, laissez la lame glisser naturellement sur le papier.
En adoptant un geste fluide et détendu, vous éviterez non seulement d’abîmer le papier, mais vous obtiendrez également des lignes nettes et précises.
Ce mouvement doux est essentiel pour un travail soigné. Pour plus de précision, prenez le temps de travailler par petites sections.
Plutôt que de tenter de découper de grandes zones en une seule fois, concentrez-vous sur des parties plus réduites.
Cette approche vous permettra de mieux contrôler vos mouvements et de réussir les détails délicats, sans précipitation.
Enfin, pour suivre les courbes avec aisance, pensez à tourner le papier plutôt que de déplacer votre main ( voir la vidéo ci-dessous "découpe d'un cercle" ).
Cette technique vous offre une plus grande liberté de mouvement, évite de tordre votre poignet et garantit des courbes harmonieuses et fluides.
En guidant la lame tout en manipulant le papier, vous apporterez une finesse supplémentaire à vos créations.
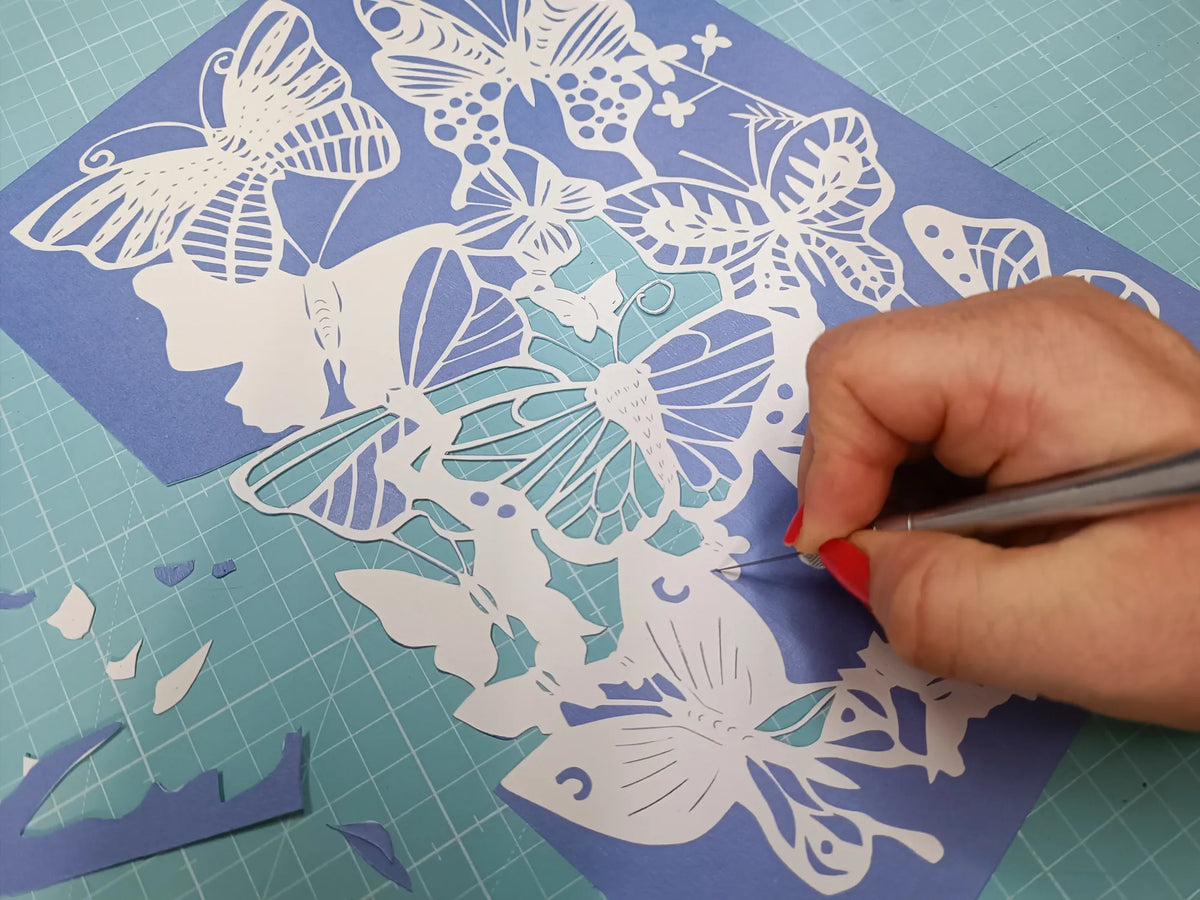
Voici le détail d'une découpe
Vous êtes nombreuses à me demander comment opérer en cas d'une découpe circulaire, voici un exemple.

La découpe avance bien !

La découpe du modèle Gingko est terminé.
💡 Astuce : Utilisez la pointe de la lame pour vous débarasser du morceau découpé (voir les vidéos). Pour la coupe de formes arrondies; faites une coupe, puis tournez le sujet, refaites une coupe, tournez le sujet à nouveau. Il vaut mieux décomposer la découpe de la forme complexe en plusieurs fois plutôt que de tordre sa main, le résultat sera meilleur.
d) Mise en valeur du Papercut
Une fois votre papercut terminé, il est temps de le mettre en valeur :
- Encadrez-le sous verre pour le protéger.
- Fixez-le sur un arrière-plan coloré pour créer un contraste.
- Créez vous même un arrière-plan; imprimé, découpé, peint, dessiné, une photo, c'est vous qui choisissez !
- Utilisez-le comme élément décoratif : carte de vœux, guirlande, ou suspension, en décoration au mur, sur un meuble... Les possibilités sont infinies.
Voici le modèle "Gingko" une fois réalisé et mis sous cadre.
3. Points importants à ne pas négliger
- Sécurité avant tout : Lorsque vous travaillez avec un cutter, la sécurité est primordiale. Cet outil, bien que précis et indispensable pour le papercutting, peut être dangereux s’il n’est pas manipulé avec soin. Assurez-vous toujours de travailler dans un espace sécurisé, en gardant l’outil hors de portée des enfants ou de toute personne non familière avec son usage. Pensez également à ranger la lame dès que vous avez terminé, pour éviter tout accident.
- Concentration et patience : Le papercutting est une activité qui demande calme et attention. Installez-vous dans un espace bien éclairé, où vous pourrez voir clairement les lignes et les détails de votre modèle. Une ambiance calme vous aidera à maintenir votre concentration, car la précipitation ou les distractions peuvent nuire à la précision de votre découpe. Prenez votre temps, car chaque geste compte pour obtenir un résultat impeccable.
- Choix du papier : Le type de papier que vous choisissez joue un rôle essentiel dans la réussite de votre projet. Un papier trop fin, bien qu’agréable à manipuler, peut se déchirer facilement sous la lame, compromettant ainsi votre travail. Optez pour un papier d’une épaisseur intermédiaire, suffisamment résistant pour supporter la découpe tout en restant flexible. Ce choix garantira à la fois durabilité et finesse dans vos créations.
💡 Astuce :N'hésitez-pas à porter des lunettes de sécurité (comme des lunettes pour bricolage) cela peut vous éviter de recevoir un morceau de lame qui aurait cassé au visage. Si vous êtes fatigué, faites des pause ou arrêtez-vous et reprenez plus tard, cela peut vous éviter un accident avec la lame.
4.Petites infos pratiques à connaître
- Temps nécessaire : Avant de vous lancer dans un projet, il est utile de savoir combien de temps y consacrer. Pour un modèle simple, prévoyez environ 1 à 2 heures. Ce temps inclut non seulement la découpe, mais aussi la préparation et la mise en place. En prenant le temps qu’il faut, vous pourrez profiter pleinement de l’expérience sans vous sentir pressé. Les modèles plus complexes peuvent vous occuper plusieurs heures !
- Budget de départ : Le papercutting est une activité accessible, même avec un petit budget. Pour vous équiper avec les outils de base, comme un cutter de précision, un tapis de découpe et quelques feuilles de papier, comptez entre 20 et 30 €. Cet investissement initial vous permettra de démarrer dans de bonnes conditions et de profiter pleinement de votre nouvelle passion.
- Inspiration : Si vous cherchez des idées pour commencer, Pinterest est une mine d’or. Vous y trouverez une multitude de modèles, dont beaucoup sont gratuits et adaptés aux débutants. Que vous aimiez les formes simples ou les motifs plus travaillés, ces ressources vous aideront à trouver l’inspiration pour vos premiers projets.
- Rangement : Prenez soin de vos outils en les rangeant correctement après chaque utilisation. Une trousse de rangement ou une petite boîte dédiée est idéale pour éviter que vos accessoires ne s’abîment ou que vous vous blessiez. Cela vous permettra de prolonger leur durée de vie et de les retrouver facilement pour vos prochaines créations. Pour protéger vos modèles, il existe des cartons à dessin de toutes tailles qui permettent de les ranger sans risquer de les endommager.
5. Les erreurs courantes à éviter
- Choisir un modèle trop complexe : Evitez d'être trop ambitieux quand vous débuterez ! Il vaut mieux multiplier les modèles faciles pour acquérir de la dextérité, puis passer ensuite à des modèles plus complexes.
- Négliger la netteté de la lame : Une lame émoussée est votre pire ennemi. Non seulement elle risque de déchirer le papier, mais elle peut également rendre la découpe plus fatigante et moins précise. Changez votre lame si la pointe casse.
- Aller trop vite : Le papercutting demande de la patience. Précipiter vos gestes peut compromettre le résultat final et vous faire faire des bêtises ! Prenez votre temps pour garantir des lignes nettes et soignées.
- Forcer sur le cutter : Appliquez une pression légère et constante. Forcer sur l’outil peut non seulement endommager le papier, mais aussi augmenter le risque de blessures et de casse de la lame.
Conclusion et inspirations :
Vous voilà prêt à plonger dans l’univers du papercut, un loisir créatif accessible à tous et relaxant. Je vous conseille de commencer avec des projets simples puis d'augmenter la difficulté au fur-et-à-mesure que vous prendrez confiance en vous. Enfin, laissez libre cours à votre imagination pour mettre en valeur votre création.
📌 Envie d'aller plus loin ? Découvrez mes modèles spécialement conçus pour débutant.e.s et ajoutez une touche personnelle à votre décoration ou vos cadeaux.
Et vous ? Quel sera votre premier projet papercut ? Partagez vos idées ou créations sur mon Instagram ou dans les commentaires !
quoi faire quand on s'ennuie ?

Claire Guilpain
créatrice de Cardamine Papercut
après un diplôme aux Beaux-Arts, Claire a mis à profit sa passion de la peinture et des arts plastiques pour développer sa marque de modèles pour le papercutting, Cardamine Papercut... Lire la suite
Produit associé

Gingko
14,00€